

Mushroom Experts Mushroom Kit Ingredients: A Complete Overview
| 2 February 2024

When embarking on growing your own mushrooms at home, understanding the ingredients included in a mushroom grow kit forms a critical first step. As you open your mushroom kit for the first time, take a moment to familiarise yourself with each component. Within the typical kit, you'll find a mushroom substrate bag filled with grain, a mushroom spore syringe and needle, and a sterile wipe. You'll use the sterile wipe to disinfect the injection site, insert the needle to inoculate the grains with the spore syringe, and seal the hole. After allowing the mycelium to colonise by incubating the bag, you'll be ready to mix and initiate fruiting for a bountiful harvest. The key contents empower you to progress through cultivation, but don't hesitate to reach out with any questions that arise along the journey.
What's Included in Your Mushroom Grow Kit
To grow your own mushrooms, you will require certain essential components.
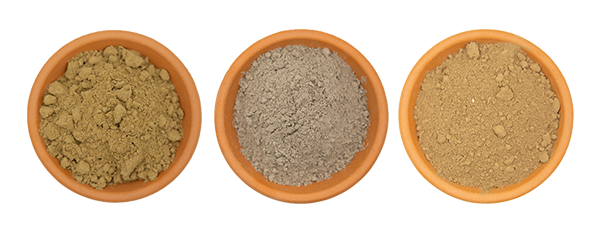
Mushroom Substrate Bag
The Mushroom Substrate Bag contains sterilised grains, typically rye or wheat, that provide nutrition for the mushroom mycelium to colonise.
Mushroom Spore Syringe
The Mushroom Spore Syringe contains millions of spores suspended in a sterile liquid. Once inoculated, the spores will germinate and colonise the substrate.
Sterile Wipe
The Sterile Wipe is used to sanitise the injection point on the Mushroom Substrate Bag prior to inoculation with the Mushroom Spore Syringe. Proper sterilisation technique is critical to avoid contamination.
Additional Equipment
You will also need basic equipment like a lighter or gas stove to flame sterilise the needle, adhesive tape to seal the injection point, and a location with suitable temperature and humidity conditions for incubation and fruiting.
With the right technique and care, these components will enable you to cultivate your own mushrooms. Be sure to follow the instructions carefully and maintain high standards of hygiene and sterility at each step. If done properly, you will be rewarded with a successful harvest of home-grown mushrooms.
Step-by-Step Guide to Inoculating Your Mushroom Substrate Bag
- Ensure you have gathered all the necessary components from your mushroom growing kit:
- Mushroom Substrate Bag
- Mushroom Spore Syringe
- Sterile Wipe
- Sanitise the injection site on the Mushroom Substrate Bag using the provided Sterile Wipe. The injection site should be at the bottom of the bag where the grains are located.
- Attach the needle to the Mushroom Spore Syringe. Sterilise the needle using a flame until it glows red, then allow to cool.
- Inject the spore solution through the sanitised injection site in the Mushroom Substrate Bag. Only insert the tip of the needle into the bag.
- Seal the injection site with tape or glue to prevent contamination.
- Gently move the inoculated Mushroom Substrate Bag to a warm, dark location away from direct sunlight. An ideal temperature range is 70-77°F or 21-25°C.
- Monitor the Mushroom Substrate Bag for signs of colonisation over 7 to 14 days. The grains should turn white as the mycelium grows.
- Once colonised, carefully mix the contents of the bag. Avoid damaging the seal.
- Return the bag to the warm, dark location for another 14 days.
- Follow the fruiting instructions for your mushroom species to complete the process. The Mushroom Substrate Bag should feel firm when fully colonised and ready to fruit.
Ideal Conditions for Colonisation of Your Mushroom Kit
For the colonisation of your mushroom kit to be successful, providing the optimal conditions is crucial. The environment in which you place your mushroom kit should be:
- Dark: Mushroom spores and mycelium prefer darkness for growth. Place your mushroom kit in a closet, drawer or other area away from light.
- Still: Moving or shaking the bag during colonisation can damage the developing mycelium. Handle the mushroom kit as little as possible once inoculated.
- Warm: An average temperature of 24°C is ideal for colonisation. Most cupboards, wardrobes and drawers will provide suitable warmth. Use a temperature gauge to monitor the temperature if needed.
- Humid: While the mushroom kit should not be soaked or sitting in water, the environment should be moderately humid. You can place a humidifier in the area or mist the outside of the bag with a spray bottle. Make sure no excess water pools around the bottom of the bag.
- Sterile: To avoid contamination from moulds and bacteria, the area should be as sterile as possible. Clean the area before placing your mushroom kit there. Wash your hands thoroughly after handling the kit.
After 1-2 weeks, check on your mushroom kit. Once the grains have been fully colonised, the bag should feel firm to the touch. Gently mix the contents by shaking, then place back in the ideal conditions for another 2 weeks. At this point, your mushroom kit will be ready to begin fruiting by following the instructions provided for your specific mushroom strain. By providing the proper environment during these critical periods of growth, you'll give your mushrooms the best start on the path to maturity.
When to Mix Your Grains and Substrate Together
Once your grains have been fully colonised by the mushroom mycelium, typically 1 to 2 weeks after inoculation, it is time to mix the grains with the mushroom substrate. This mixing of the spawn and substrate is known as spawning. At this point, the substrate provides nutrition and moisture for the mushroom mycelium to continue growing.
To mix the grains and substrate:
- Carefully shake the bag to distribute the colonised grain spawn throughout the substrate. Gently massage and crumble the spawn and substrate together as much as possible without damaging the bag.
- Place the bag in a dry, dark area with ambient temperatures of 65 to 72°F. This temperature range is ideal for colonisation.
- Leave the bag undisturbed for 2 to 3 weeks as the mycelium fully colonises the substrate.
- Once the substrate is fully colonised, the bag will become firm. At this point, the mycelium has obtained all available nutrients, and the kit is ready to fruit.
- Follow the fruiting instructions provided for your specific mushroom strain. The kit must be placed in a humid environment with fresh air to produce mushrooms.
Mixing the grain spawn and substrate together provides the nutrition and environment for the mushroom mycelium to spread, eventually producing mushrooms. Be very gentle when mixing the bag to avoid damaging the mycelium or the bag. Providing the proper temperature, humidity, and environmental conditions after mixing will encourage your mushroom kit to fruit.
Fruiting Your Mushrooms: Following Species-Specific Instructions
Once your inoculated mushroom substrate bag is fully colonised, it is ready to fruit your mushrooms. The fruiting process will differ slightly depending on the specific mushroom species in your kit. Carefully follow the instructions provided for your mushroom type to yield the best results.
For most species, the fruiting process typically involves:
- Cutting or slicing an X-shaped slit in the top of the bag to allow for oxygen flow and humidity control. The cuts should be 2 to 3 inches in length.
- Misting the bag with distilled water 2-3 times per day to keep humidity high. The ideal relative humidity is around 95%.
- Placing the bag in a container, such as a tray or bag, to catch any drips.
- Keeping the bag in indirect sunlight or shade at room temperature. Fluctuating temperatures can stress the mycelium and reduce yields.
- Harvesting mushrooms once the caps have flattened out. Twist or cut them at the base.
- Soaking the substrate in water after the first flush to rehydrate, then returning it to fruiting conditions to produce subsequent flushes. Most kits will produce 2 to 3 flushes.
- Being extremely careful when handling the substrate, as the mycelium can be damaged. Do not pack or squeeze the bag.
By carefully following the fruiting instructions for your specific mushroom species, you will be able to successfully grow multiple flushes of homegrown mushrooms from your mushroom kit. Please reach out if you have any additional questions on fruiting your mushrooms.
Conclusion
As we conclude, it is clear there are several key ingredients in a mushroom growing kit that enable you to cultivate your own mushrooms at home. From the mushroom substrate bag filled with grain, to the spore syringe and sterile wipes, each component plays an important role. After injecting the spore syringe into the substrate, incubation provides the ideal environment for the mycelium to colonise before fruiting can occur. Patience and care is required, but following the simple steps outlined above will set you well on your way to growing your own gourmet mushrooms. The process is rewarding, educational and accessible to any amateur cultivator. We hope the overview provided equips you with the knowledge needed to get started on your mushroom growing journey.