


How to Install a Uniseal: A Complete Guide
By Hydro Experts | 16 September 2026
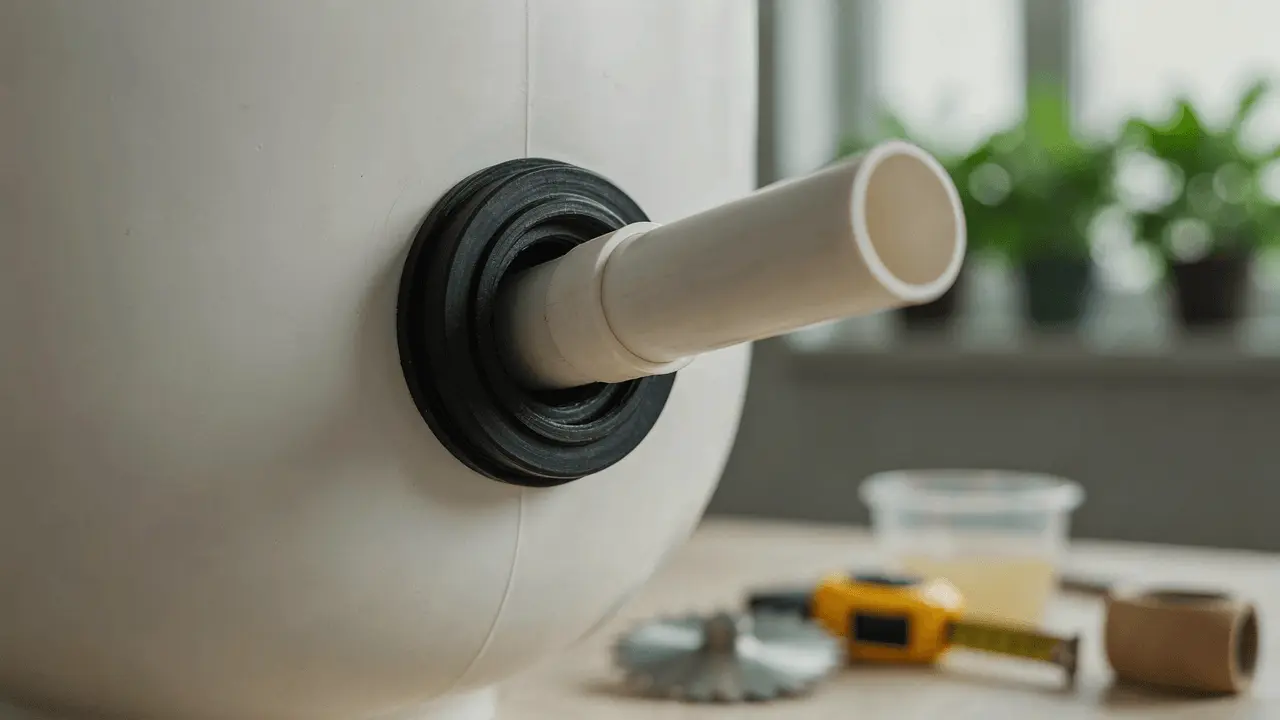
Drilling a hole into a bucket, drum, or reservoir and getting a genuinely watertight seal around a pipe sounds like it should need a proper bulkhead fitting. In a lot of hydroponic and aquaponic setups, it doesn't. A Uniseal does the same job with a single rubber fitting, no threads, no nuts, no gaskets to align, and it works on curved surfaces where a standard bulkhead fitting can't seal properly at all.
Here's a full guide to what a Uniseal actually is, how to install one properly, and the exact hole and pipe sizing you need to get a leak-free result the first time.
What Is a Uniseal and Why Use One?
A Uniseal is a single moulded rubber fitting designed to create a watertight, pressure-resistant seal between a pipe and the wall of a tank, drum, bucket, or similar container. Rather than relying on separate washers, nuts, and threaded fittings the way a traditional bulkhead does, a Uniseal is one piece that expands around the pipe as it's pushed through, creating the seal through friction and compression rather than mechanical clamping.
Why growers and DIY builders reach for Uniseals specifically:
- They work on curved surfaces. Storage drums, round buckets, and irregular container walls are difficult or impossible to seal properly with a flat bulkhead fitting, but a Uniseal handles the curvature without issue.
- They're built to handle serious conditions. Uniseals are resistant to oils, greases, sewage, waste, and a wide temperature range, holding up under both pressure and suction.
- Installation is genuinely simple. There are no separate parts to align or tighten, just a hole, the seal, and the pipe.
- They reduce labour and material costs, since one component replaces what would otherwise be a multi-part bulkhead assembly.
- They're suited to a wide range of setups, from hydroponic reservoirs and sump tanks to irrigation systems and general tank plumbing.
What You'll Need Before Starting
- A Uniseal sized correctly for your pipe (see the sizing table below)
- A hole saw matching the size specified for your Uniseal
- Fine grit sandpaper
- Water or a small amount of dish soap, as a lubricant
- The length of pipe you're installing
How to Install a Uniseal Step by Step
- Cut the hole to the correct size. Using a hole saw, cut a hole in the wall of your tank, drum, or bucket to the exact size specified for your Uniseal. Getting this size right matters more than any other step, since an oversized or undersized hole is the most common cause of a poor seal.
- Clean up the cut edge. A clean, even cut is essential for a leak-free result. Use fine grit sandpaper around the edge of the hole to remove any burrs or rough spots left behind by the holesaw.
- Insert the Uniseal into the hole. Push the Uniseal into the hole with its flange, the wider side, facing the direction the pipe will be inserted from.
- Prepare the pipe end. Make sure the end of the pipe you're inserting is cleanly cut, with no sharp edges or burrs. A slight bevel filed onto the pipe's edge makes the next step considerably easier.
- Lubricate the pipe. Apply water or a small amount of dish soap to the outside of the pipe end. This lubrication is what allows the pipe to slide through smoothly rather than dragging or snagging on the rubber.
- Push the pipe through from the flange side. Insert the pipe through the Uniseal starting from the wide flange side. As the pipe passes through, the Uniseal expands snugly around it, and the friction of the rubber against the pipe is what holds it firmly in place and creates the seal.
Once the pipe is fully inserted to your required depth, the seal is complete. No curing time, clamps, or additional sealant is needed.
Next, connect the rest of your plumbing. Our guide to how to join pipes for your hydroponic system covers the next step, and you can find matching hydroponic pipes and fittings in the Hydro Experts range.
Uniseal Pipe and Holesaw Size Table
Getting the right Uniseal for your pipe size is the most important part of this whole process. Always measure the outside diameter (O.D.) of your pipe first, since this is what needs to match the Uniseal's rated pipe O.D. size, not the pipe's nominal or inside diameter.
| Uniseal® Part No | Uniseal® Size (Sch 40 Pipe I.D.) | Pipe O.D. Size | Holesaw Size Required | |||
|---|---|---|---|---|---|---|
| Sch 40 Pipe I.D. (Imperial) | Sch 40 Pipe I.D. (Metric) | Pipe O.D. (Imperial) | Pipe O.D. (Metric) | Holesaw Size (Imperial) | Holesaw Size (Metric) | |
| U018 | 3/16" | 4.75mm | 0.250" | 6mm | 0.315" | 8mm |
| U025 | 1/4" | 6.5mm | 0.375" | 9.5mm | 0.5" | 12.7mm |
| U0312 | 5/16" | 8mm | 0.40" | 10.5mm | 0.5" | 12.7mm |
| U038 | 3/8" | 9.6mm | 0.675" | 17mm | 1.0" | 25.4mm |
| U050 | 1/2" | 12.7mm | 0.84" | 21mm | 1.25" | 31.7mm |
| U075 | 3/4" | 19.2mm | 1.050" | 27mm | 1.25" | 31.7mm |
| U100 | 1" | 25.4mm | 1.315" | 33mm | 1.75" | 44.4mm |
| U125 | 1 1/4" | 32mm | 1.66" | 42mm | 2" | 50.8mm |
| U150 | 1 1/2" | 38mm | 1.9" | 48mm | 2.5" | 63.5mm |
| U200 | 2" | 51mm | 2.375" | 60mm | 3" | 76.2mm |
| U275 | 2 3/4" | 70mm | 2.913" | 74mm | 4" | 101.6mm |
| U300 | 3" | 76.2mm | 3.5" | 89mm | 4" | 101.6mm |
| U400 | 4" | 102mm | 4.5" | 114mm | 5" | 127mm |
| U400-SDR3 | 4" | 102mm | 4.33" | 110mm | 5" | 127mm |
A couple of notes on the table above:
Several Uniseal sizes share the same holesaw requirement, specifically the 1/4" and 5/16", the 1/2" and 3/4", the 2 3/4" and 3", and the 4" and 4" SDR35 pairs. The difference between each pair comes down to the thickness of the Sarlink 4165 rubber used, meaning Uniseals sharing a hole size are interchangeable. This is genuinely handy if you already have the smaller size on hand and want to step up your flow without redrilling.
Always measure your pipe's outside diameter before ordering. This is the single most important measurement for getting the correct seal, matching it against the Pipe O.D. column rather than relying on a pipe's nominal size label.
Common Mistakes to Avoid
A few issues account for most failed Uniseal installations.
Cutting the hole to the wrong size
Even a small deviation from the correct hole saw size, in either direction, compromises the seal. Always double-check against the table before cutting.
Leaving rough edges around the hole
Skipping the sanding step leaves burrs that can catch the rubber during installation or create small gaps once the pipe is in place.
Forcing a dry pipe through without lubrication
Skipping lubrication makes the pipe far harder to insert and increases the risk of damaging the Uniseal in the process.
Measuring the wrong pipe dimension
Matching a pipe's inside diameter or nominal size to the Uniseal instead of its actual outside diameter is one of the most common sizing mistakes.
Inserting the Uniseal the wrong way around
The flange, the wider side, needs to face the direction the pipe is coming from, not the other way around.
Need the Right Uniseal for Your Setup?
Setting up a hydroponic reservoir, sump tank, or irrigation system and need the right Uniseal for the job? Browse the full Uniseal range at Hydro Experts, or reach out to the team for help sizing the right fitting for your pipe.
While you're setting up, you can also browse hydroponic pipes and fittings, hydroponic trays and tanks and water pumps, or contact the Hydro Experts team for sizing help.
FAQs
A bulkhead fitting relies on separate threaded parts, washers, and nuts, and generally needs a flat surface to seal properly. A Uniseal is a single moulded rubber piece that creates its seal through expansion and friction as the pipe passes through, which allows it to work on curved surfaces a bulkhead can't handle.
Yes, this is actually one of the main reasons growers use Uniseals over standard bulkheads. Curved surfaces are exactly where Uniseals perform best, since they don't rely on a flat mounting surface the way threaded bulkhead fittings do.
Just fine-grit sandpaper to clean up the cut hole, and water or dish soap to lubricate the pipe during insertion. No additional sealant, clamps, or adhesive is required.
Measure the outside diameter of your pipe and match it against the Pipe O.D. column in the sizing table. This is more reliable than going off a pipe's nominal or inside diameter measurement.
Uniseals are generally designed for a long-term, one-time installation, since the seal relies on the rubber gripping the pipe tightly. Repeated removal and reinsertion can gradually reduce how tightly the seal holds, so it's best treated as a permanent fitting once installed.